Stirling Old Bridge.

Earliest period. The Roman river crossing.
Bellenden’s 16th century translation of Boece (Ref) tells us that Agricola “come to Striuelyng.... and nocht lang efter he byggit ane bryg ouir Forth...”. However, Boece provides no source and is not renowned for reliability. The definitive source should be the Roman historian Tacitus, but he records nothing of this kind. Tacitus does note, however, that when the army moved beyond the Scottish isthmus, it was “…as if into another island” (The Agricola, 23 (Ref)). Certainly, the geographical and military significance of this particular river crossing continued throughout medieval times and on until the eighteenth century. Movement between northern and southern Scotland was vitally influenced by the topography of the Forth Valley. The Stirling crossing has always been the great junction of Scottish traffic.
The first-century Roman road approaches from the south-east. Very recent archaeological findings by Cook (Ref), at Beechwood (279286 691995), appear to confirm the general direction shown on the 1856 edition Ordnance Survey which traces the road from Torwood through the present day Pirnhall roundabout and on down into the town. Excavations in the 1970s confirmed the road in the gardens of houses in the King’s Park area (279169 692735) which lie on an extension of that line, and also just within the main gate of the Park itself (279129 692926). This last confirmed finding is still one mile short of the river.
The most likely Roman crossing was at the ancient ford of Kildean (278523 695021), but despite field observations and excavations nothing has been found to confirm this. Equally the road might have veered west or east round the castle in the direction of today’s bridged crossing. Kildean and Bridgehaugh are a little more than a mile apart. There is nothing Roman to be found at either, nor is there any evidence of the road immediately on the north bank, athough there is a very ancient paved causeway going North from Bridgehaugh which could be significant. The confirmed Roman road first re-appears some 6 miles to the north, beyond Dunblane, at 279424, 704570, on the south bank of the Allan Water. From there it progresses up into Perthshire. The road was consolidated and repaired in the Antonine period (circa 140AD), and since we know it was still in use in medieval times it is reasonable to presume that it was used in the Roman Severan invasion of 208AD. Dio Cassius (Ref) describes the Severan campaign in some detail, and tells us that time was spent by this enormous army ‘in cutting down the forests, levelling the heights, filling up the swamps, and bridging the rivers.’ A coin celebrating the emperor’s successes in Scotland, in 208, features a bridge over a river.
It seems very probable that the old Roman road - and all its river crossings- was in use through the Dark Ages and into the medieval period.
Early medieval period and the oldest bridge.
Boece also records that in 855 AD Scotland was invaded by Northumbrian princes, Osbrecht and Ella, who had allied with the Cumbrian Britons in order to defeat the Scots. Having secured the castle they threw a stone bridge over the Forth, and on the top raised a crucifix with an inscription: -
"Anglos a Scotis separat crux ista remotis. Hic armis Bruti: Scoti stant hic cruce tuti."
Bellenden’s translation was in poetry. Later historians have described the language as crude ‘monkish’ Latin, but today an approximation seems to be agreed:
"The cross separates English from Scots, distancing them. Highlanders (Picts?) stand protected by force of arms, Scots by the cross”.
John of Fordun (14th century) makes no record of this event and nor do medieval English historians. Its limited authenticity comes only from the 13th-century Common Seal of the Burgh of Stirling. This 9cm round seal impression shows a bridge, apparently of wood, with eight piers of stone, a crucifix and the last part of the same motto surrounding it. It is possible that Boece began with the 13th century seal and retro-fitted a 9th century narrative . However, if ‘Bruti' implies Pictish Caledonians, or Britons (distinct from Dalriada Scots), then that distinction alone does appear to date the seal (and the bridge) to a demographic that existed several hundred years earlier than the late 13th-century. The seal was referred to in 1296, although William Drysdale (Ref) claims to have seen a document of 1211, referencing it in the Edinburgh Advocates Library. There is a casual reference to the Bridge at Stirling in a case of arbitration, dated 1220, in the Register of Dunfermline No 216. In 1230, it was referred to in the third Act of Alexander II, enacted at Scone.
Later Medieval Period.
Mathew Paris’s 1247 map (right) appears to show only one bridge in Britain: the one at Stirling on the River Forth (London Bridge,1209, was certainly obscured by the city detail and perhaps others were similarly hidden). The ‘Pons Estruelin' seems to be a bridge of substance. The geography is inaccurate and distorted - as was typical of maps of this age - but the key impression is that the Forth and Clyde Valleys were an enormous natural barrier, effectively isolating the region beyond Stirling . This area is prominently labelled Scocia Ultra Marina (Scotland beyond the sea). In medieval times the Forth estuary was indeed called ‘The Scottish Sea’. It seems that in the 13th century an extensive carse-marsh combined with a large estuary to limit access to the country beyond Stirling. Passage was largely dependent on Paris’s bridge. That might suggest that it was not a temporary or recent feature on the landscape. The map also gives significance and credibility to Tacitus’s first-century Scottish isthmus description,“velut in aliam insulam” (as if into another island). Stirling remained the only Forth crossing until 1769 when the bridges at Frew and at Drip were built.
The Battle of Stirling Bridge in 1297 was a significant Scottish victory in the Wars of Independence. Over the past seven centuries, the events surrounding the battle have been recounted and reinterpreted. The role of William Wallace, initially marginalised in contemporary accounts, was later amplified and romanticised in both history and popular culture. The rebellion against English authority appears to have been driven, in part, by widespread resentment towards heavy-handed governance, notably the imposition of burdensome wool taxes. There were also concerns among the Scottish nobility about the prospect of compulsory military service under English command, in action against France. The uprising began in the spring of 1297 in two distinct regions: Wallace in the south, and Andrew Moray in the northeast. Both efforts were successful in their early stages, particularly in Aberdeen, where a provisional government was established. In response, Edward I dispatched an English force under the command of the Earl of Surrey, supported by Hugh de Cressingham, the king’s treasurer in Scotland. Cressingham also recruited reinforcements from northern England. By August, a unified Scottish force had assembled to the north of Stirling, confronting the English across the narrow Stirling Bridge the following month. While estimates of the size of each army vary, most historians suggest that neither force exceeded 10,000 men. It seems, from all accounts, that the English command committed a significant tactical error: they attempted to move their army across a bridge that was likely no more than nine feet wide, rendering their troops highly vulnerable. This decision is generally attributed to overconfidence with underestimation of the Scottish forces. Cressingham had reportedly dismissed strategic advice to use a nearby ford—possibly at Kildean—for a flanking manoeuvre, an important historical detail which appears to place the actual battle site at Bridgehaugh. The Scots withheld engagement until a substantial portion of the English army had crossed and was effectively isolated on the north bank. At this juncture, the bridge was deliberately collapsed . The result was a decisive rout: the English forces on the north bank were annihilated, Cressingham was killed, and Surrey retreated to Berwick. English baggage and supply wagons were abandoned, and Stirling Castle capitulated shortly thereafter. Primary sources from the period provide little clarity regarding the exact location of the bridge, though the advice given to Cressingham concerning the nearby ford may offer a valuable geographical clue. A particularly enduring legend concerns a Scottish foot soldier named John Wright, who is said to have been tasked with removing a series of structural pins to bring down the bridge(Blind Harry Poem. Barbour(Ref)) He was subsequently nicknamed "Pin Wright," and the tradition holds that the name "Pin" was passed on to the firstborn of each generation of the Wright family. This custom is reputed to have continued until the death of the last known "Pin Wright" in 1900, maintaining a direct familial link to the battle for over six centuries.
Nineteenth-century historians engaged in extensive debate over whether the site of the battle, the ancient crossing and the first bridge lay at Kildean or Bridgehaugh. While the prevailing view remains that the Romans crossed at Kildean, the question of the “Wallace Bridge" has now been resolved. In 1905, the remains of two ancient bridge piers were discovered at Bridgehaugh, situated approximately 60 yards upstream of the current medieval bridge and lying below the waterline. These piers measured approximately 8 metres in length and 4 metres in width. Their presence was confirmed during a period of drought in 1955, when low water levels made them visible once again. Further investigations were undertaken in 1996 and 1997 by Ronald Page(Ref), in collaboration with teams from St Andrews University, Stirling University, and the British Geological Survey, employing sonar imaging and underwater probing techniques. This work resulted in the identification of two additional piers, matching the earlier finds in both size and spacing. The configuration of the remains suggests that the original structure may have comprised eight piers, with four possibly having been lost to erosion or flooding. These findings support the hypothesis of a wooden bridge construction, closely resembling the depiction found on the above13th-century Stirling Burgh Seal. Some of the stones recovered from the newly located piers exhibited dressed masonry, indicative of skilled workmanship. Although fragments of timber were retrieved, they were unfortunately unsuitable for dendrochronological analysis, rendering precise dating impossible.
A notable feature of the remains is their orientation, which is atypical for bridge construction. The alignment lies at a 60-degree angle to the present river flow, and at a 30-degree angle to the existing medieval bridge, which itself is misaligned relative to the river’s current. Since bridge builders typically orient structures to face the current—particularly to protect the piers with properly aligned cutwaters—this misalignment is puzzling. Inglis(Ref) suggests that the River Forth may have altered its course over time, which could account for the unusual orientation. Although most historical maps lack the detail required to verify this theory, a few do suggest a more perpendicular relationship between the river and the later medieval bridge. Page’s study provides extensive documentation of the findings, including a proposed reconstruction of the bridge as an eight-pier structure with inter-pier spans of approximately 9 metres.
In terms of historical context, following the Scottish victory at Stirling Bridge in 1297, Edward I of England reoccupied Stirling Castle within a year. By 1304, there are references to a ferry operating at the crossing point. In 1305, Edward issued a writ for the repair of the bridge, though it appears these repairs were never carried out. Throughout much of the fourteenth century, river crossings were made by boat, with ferry services documented during this period. However, references to ferries cease after 1392, which may suggest the re-establishment of a bridge. This interpretation is complicated somewhat by a document from 1407, in which Pope Benedict, writing from France, refers to a “very ruinous” bridge, noting that its condition was due to its “great age.” Furthermore, in 1402, St James’s Hospital and Inn was situated at the northern end of the bridge, indicating a functional crossing point by that time.
The Present Bridge
Construction of a new bridge at Stirling commenced during the reign of Robert III and was completed in 1415, during the regency of the Duke of Albany. In 1424, an English spy reported to King Henry VI that the bridge was "broken," a statement which may imply that the structure was still at least partially composed of timber. Additional evidence for the continued use of wood is found in records from 1430, which note the transportation of timber to the bridge for repairs. ( Note: timber is also required for false-works when constructing arches). The bridge played a prominent role in royal and political affairs throughout the 15th and 16th centuries. Notably, King James I crossed it in a ceremonial procession in 1425, followed by James II in 1452, and James III in 1470. In 1456, the northern approach to the bridge, known as the Causeway (or Calsay), was repaired and upgraded, likely to accommodate increasing traffic and the demands of royal usage.
In 1488, rebel forces defended the bridge in the days leading up to the Battle of Sauchieburn, where James III was ultimately killed. In 1528, the young James V famously escaped from his guardians at Falkland and was given refuge as he crossed the bridge at Stirling, marking a turning point in his assertion of independent rule. Later, in June 1565, Mary, Queen of Scots made a ceremonial crossing of the bridge accompanied by her new fiancé, Henry Darnley. Ironically, following Darnley's murder in 1567, the bridge would again become a site of political consequence. In 1571, Archbishop John Hamilton was hanged at the bridge, accused of participating in the conspiracy surrounding Darnley's death and of continued support for Mary, who was widely believed to have been complicit. By the end of the sixteenth century, the bridge had once again fallen into disrepair. A record from 1598 describes it as being in a state of ruin.
Seventeenth century and later.
A significant structural improvement to the Stirling Bridge seems to have occurred around the turn of the seventeenth century. By 1600, both ends of the bridge had substantial masonry over-arches, and an iron gate was installed at the northern arch as part of the town's defensive infrastructure. During this period, the central pier buttresses were extended to parapet height, and the pedestrian refuges were roofed over and converted into a guardhouse. This location also functioned as a toll point, where customs duties were levied on goods entering the Royal Burgh. By the latter half of the seventeenth century, these tolls were leased out (or "franchised") for approximately £1,000 per annum—an amount that, when adjusted for contemporary GDP per capita, would equate to over £3 million. Numerous references throughout the seventeenth century attest to ongoing maintenance and repair work on the bridge, reflecting its continued functional and economic importance.
From the early seventeenth century onward, the Stirling crossing assumed an increasingly central role in one of Scotland’s most vital economic activities: cattle. The intricate network of drove roads across the Highlands largely converged on Crieff, from which point much of it funnelled into narrow corridor near Stirling before proceeding to Falkirk and then branching out southward again. In the eighteenth century, the great trysts at Crieff—and later at Falkirk—became major centres for livestock markets. Massive herds were driven down through Stirling en route to Falkirk and ultimately to England, with the Scottish Highlands effectively serving as grazing grounds for the English market.
The bridge also retained military significance well into the modern period. In 1644, it was fortified and garrisoned by the Covenanters to repel the Royalist forces of the Marquis of Montrose, and shortly thereafter it facilitated the crossing of the entire Covenanter army. In 1650, Charles II made a ceremonial crossing of the bridge en route to his Scottish coronation. The following year, during Cromwell’s invasion, the bridge was held by General David Leslie’s Scottish forces, compelling Cromwell to undertake a perilous amphibious landing at Inverkeithing. During the Jacobite rising of 1715, government troops occupied the bridge to block the advance of Jacobite forces seeking to link up with reinforcements from the south. In the latter stages of the Battle of Sheriffmuir, government troops were forced to retreat across the bridge, pursued by the Earl of Mar’s forces. The bridge later became an integral component of the military road network built by Major William Caulfeild, in 1741, connecting Stirling to Crieff and the Highlands beyond. In the 1745 Jacobite uprising, Prince Charles Edward Stuart's forces were compelled to bypass Stirling by crossing the River Forth via the marshes at Frew, approximately 15 kilometres to the east, only because the bridge was defended by government troops. In response to the threat, Governor Blakeney, commanding Stirling Castle, ordered the demolition of the bridge’s southern arch—a decision met with protest from the townspeople. In January 1746, government troops under the Duke of Cumberland laid wooden beams across the breach to pursue the retreating Jacobite army and avoid a lengthy detour. The damaged arch was not repaired until 1749. The scar of this intervention remains visible today, and at low tide, dressed masonry rubble—possibly originating from the original damage—can still be observed beneath the southern span. The structural losses incurred during the mid-eighteenth century were never fully reversed. The southern over-arch, destroyed in 1746, was never reconstructed, and in 1773, the northern over-arch and its iron gate were also removed, marking the end of the bridge’s function as a fortified and tolled crossing.
The bridge today.
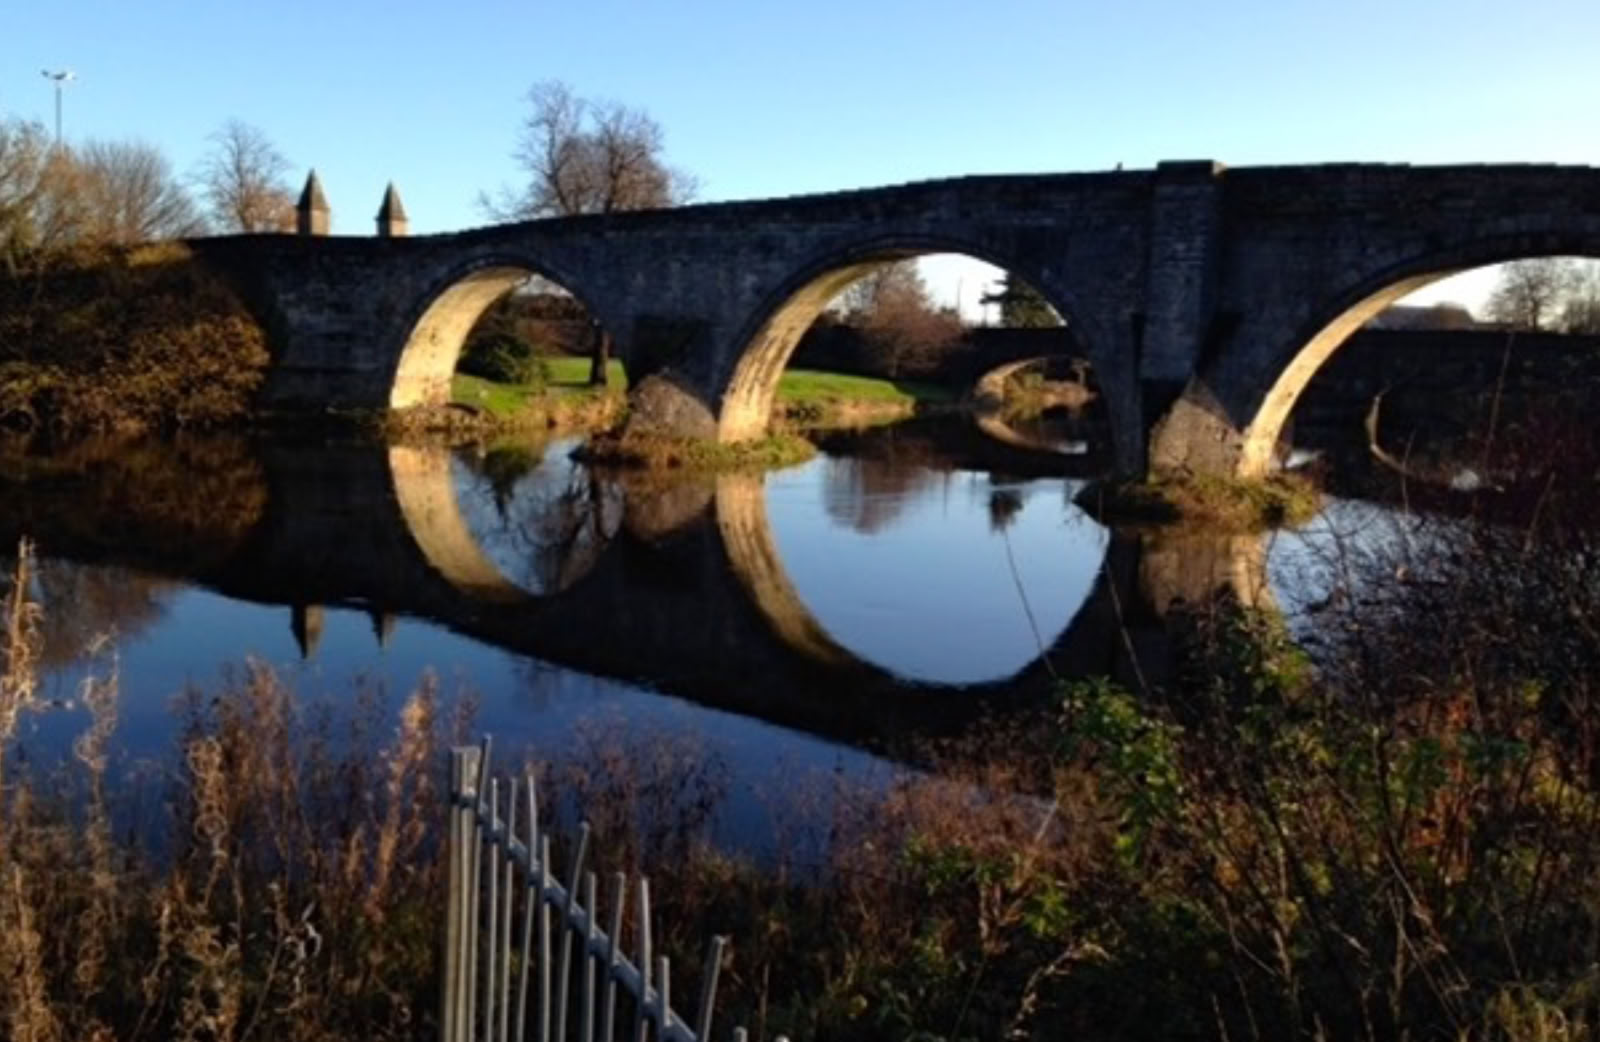
Stirling Old Bridge is now a pedestrian walkway. There are four un-ribbed semicircular arches with varying spans of 38 ft, 55 ft, 56 ft, and 48 ft, running from south to north. The bridge is 13 ft wide, measured from parapet to parapet. The arches have two layers of well-cut voussoirs with opposed chamfering. The spandrels and walls are constructed from weathered ashlar stone, while the approaches at both ends are made of eighteenth-century rough, un-faced, un-coursed random rubble. The bridge rests on massive piers with large cutwaters (12 ft wide) on both sides. There are also substantial buttresses on the downstream side of the northern approach. The deck is cobbled and features a noticeable hump, a slight bow downstream, and a double defensive twist on the northern approach designed to hinder charging horsemen. The arches spring off-center on each pier, causing the parapets to be slightly misaligned, a feature best observed at the central refuges. This additional twist is deliberate and is believed to have a connection to preventing witchcraft, a feature also seen on some other Scottish bridges. At each end of the bridge are pilasters and pylons where the overarches once stood. Although the arches were removed in the 18th century, remnants of the supporting corbels remain visible ( M.Cook. pers. comm.). Repairs from the 18th century can still be seen on the spandrels and intrados. Foundation repairs carried out in 1912 revealed that the piers rest on a platform of horizontally laid oak beams, a good description of a brander(Structure Section).
The build date of the present bridge is uncertain, even contentious. It appears on all old maps and is commonly believed to date to the early 15th century, during the reign of Robert III. It is said to have been built from Ballengeigh stone, the same quarry that supplied stone for Holy Rude Church in 1406, and the stonework is indeed rather similar. However, some scholars argue the bridge’s style suggests a later construction date. Inglis rightly reminds us that bridges built around 1410 typically had smaller, equal-sized Gothic arches with larger piers, and proposes the possibility of a 16th-century rebuild. He also points out that the Old Bridge of Earn, which was similar in style and structure (demolished in 1976), may have been built in the same period, even by the same architect. Certainly, both bridges were in poor condition by the 1590s, but there is no firm evidence confirming their construction dates. Fenton (Ref) also notes the similarity between the two bridges and supports a 16th-century date. We know that by the early 1600s, the Stirling Bridge had overarches and a large iron gate, and a new toll had been introduced. Harrison2 (Ref), in 1997, pointed out that there is little 16th-century archival evidence for such an impressive structure but did find a record from 1542 allocating funds for the “reformatioun of the bridge.” This reference is hard to interpret but occurred during a period of national turmoil, with many local and national records lost in 1660. It is possible there were three constructions, the second one ( built in 1415) being also in wood, with stone piers, and lasting until the 16th century, by which time the above funds were available. There are no records to help us with this.
In 1806, the town petitioned the government for £6,000 to widen the old bridge. Fortunately, nothing was done. Instead, Thomas Telford was consulted and proposed building a new bridge, but his plans were rejected. The contract went to Robert Stevenson, grandfather of the author of Treasure Island. Stevenson’s bridge, completed in 1829 about 100 meters downstream, is a beautiful five-span ashlar structure with stilted segmental arches and rounded cutwaters. The courses of the spandrels elegantly follow the lines of the voussoirs.
The old medieval bridge closed to traffic in 1831 and has since been used as a pedestrian pathway and tourist attraction. It is now managed by Historic Scotland.


Page last updated Aug.'25